Thursday, January 23, 2014
Friday, May 17, 2013
Altered Shabby Chic Teacup Pin Cushion
Beautiful Altered Teacup Pin cushion......I altered my own tea cup and saucer that I was displaying in my kitchen.....Thought it would be prettier in my scrapbook room....all "jazzed up".......These things are sooooo addicting ....and if you think making the stick pins will keep you buzzzzzzy...try altering the cup and saucer. I was inspired by so many youtubers and others that altered a teacup and saucer...I just had to give it a try......Now I know I will have to make more of these .....they make great pieces for my candy station ....and they are functional..(Yep ...a stickpin holder...)..so now I can continue to make and collect the stickpins ...which are just as addicitng as the altered cup and saucer.......Check out my pics....Gorgeous huh???????.........Remember to check out your local thrift shops for thrifty finds that you can alter into beautiful show pieces........TFL
.JPG)
.JPG)
.JPG)
.JPG)

Altered Lace/Trim Spool
I altered this spool using the lace/trim spool from (hehe) lace and trim that I purchased from Joann's $1 ribbon spot....I adhered chipboard circles to each of the outside circled shapes to make them sturdy by merely tracing the circles......The traced circles (about 5 on each side ) were glued to one another, then to the spool , gesso'd and decorated......I used G45 paper for the inside banner and the spool....and adhered lace to both sides....I lightly decorated the outside and embellished the inside banner using K & Co sentiments to go .....(yep ...a really old product....) and G45 paper and paper pieces from Secret garden......I did adhere chipboard to the G45 pic on top of the spool to give it a tile effect, also added beads, bling, ribbon, M's - $2 metal bird and a stick pin......TFL
.JPG)
(banner attached to spool)
.JPG)
.JPG)
.JPG)
(inside of banner)
Altered Vintage Shabby Chic Shoe
When I first saw the ladies on Youtube altering shoes.....I put it on the top of my Scrappy "To Do" list.....My list kept growing with all of these "Fab" projects I wanted to do ....and finally the altered shoe was lost in the list ...and very soon forgotten.....Well, Janet November over at MAS started making pin cushions......I have a few of those I will post too....But when she did her altered shoe Pin cushion.....I just had to go ahead and alter my shoe (well, not mine per se....I went to the thrift store and purchased a pair of shoes..hehe) .....This was soooo much fun...I was really excited about altering this shoe....as I collect miniature shoes...I love ...love ...love shoes.....(hehe..)...as a lot of us do....I did not make it a pin cushion ...but merely made it to display on my candy station ....Stay tuned for pics of my candy station also....It's a work in progress....I used a canvas covered shoe that I purchased from my local thriftshop.....loads of trims, beads, ribbons, IAR flowers, recollections bling and appliques.....I think this is a great addition to my candystation......and soooo shabby chic....TFL
.JPG)
.JPG)
.JPG)
Altered Paintbrush
This was a fun swap. I participated in a swap where we altered paintbrushes....(hehe...) ...Yep...Now these were really fun to alter...Watch out all of you DIYers....We are prettying up everything (smile). I choose to alter the paintbrush using a TH alterations die. I did use two TH die pieces, stamped the filmstrip tape and merge it between the two dies.....So the filstrip actually has images on it.....For the paintbrush I covered it in Gesso......... I used TH acrylic paint ...to give it some colour....I also used quite a few embellies to pretty it up......I was inspired by quite a few of the altered paintbrushes that I saw on Pinterest.....I was totally surprised by some of the ideas..There are very creative folks out there ....Very inspiring...So though this was my first try at making one of these ...I will be making more....I made this one for a swap...So of course ...I have to make one for me.......So....what do you think???...Is this something you would give a try????......How did I do altering this one......?...What do you think??????
(Altered Paintbrush )
.JPG)
.JPG)
.JPG)
.JPG)
.JPG)
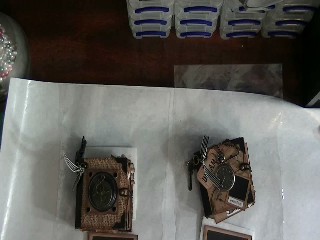
MAS "Alter - It" Swap- Altered Mousetrap
I should not have titled my post and had everyone guess at what the altered item was.....I think if I had guess from the altered items over at MAS I would have never guessed it was a mousetrap. I hesitated about altering this at first...I did think a mousetrap was sort of creepy ..(because I hate mice..and the thought of altering a mousetrap did not sit well with me.......)...So.....one of my SB buddies (Host of Alter-It Swap-Lia) sent me an altered mousetrap.......Okay...okay ...I have to confess.... ...It was cute, cute, cute........So... I was inspired to at least attempt it......
So ladies and gents.......You may want to give these a try....Over at Minialbumscraps I participated in the Alter-It Swap and this month we had to alter a mousetrap......The idea for the traps is to mount them on a small canvas and make them note holders. You all should check it out ...And I am sure you all are creative enough to use these altered traps in other ways too.....But ...the traps were fun to make ...and MAS has loads to do...... ...So..if you are looking for a place to share, inspire and create...MAS may be a great place for you to hang out......There are also a load of very creative and friendly ladies ladies there all willing to help out..... ...Go check them out.....TFL

So ladies and gents.......You may want to give these a try....Over at Minialbumscraps I participated in the Alter-It Swap and this month we had to alter a mousetrap......The idea for the traps is to mount them on a small canvas and make them note holders. You all should check it out ...And I am sure you all are creative enough to use these altered traps in other ways too.....But ...the traps were fun to make ...and MAS has loads to do...... ...So..if you are looking for a place to share, inspire and create...MAS may be a great place for you to hang out......There are also a load of very creative and friendly ladies ladies there all willing to help out..... ...Go check them out.....TFL

Saturday, December 29, 2012
Itty Bitty Tim Holtz inspired Mini for MAS
Wow ...."Happy Holidays" everyone..........Time really does fly huh??????......and .......already......christmas is over......... I had a few projects that I completed before this one, that I planned to post here ....but ....it never happened...Everytime I catch up with myself.... ....(hehe...) I run out of time again....(LOL) BUT anywho...I participated in a swap over at MAS (minialbumscraps) and this time I made a video. The swap was to make a itty bitty mini album that was at least 3x3.....I guess it could have been smaller ....(But...I am not sure....).You can check their ning site out for all of the details . The mini had to have at least 4 pages and 4 different embellishments.......They have some great swaps and challenges over there.....So ...don't forget to go over and check them out..You'll be right on time for their New Years......But...first watch my video....(hehe..)..and let me know what you think.......Thanks Merry for hosting the swap and allowing me to join in last minute.....I had loads of fun with this one.........and Thanks for watching everyone...........

Tuesday, October 23, 2012
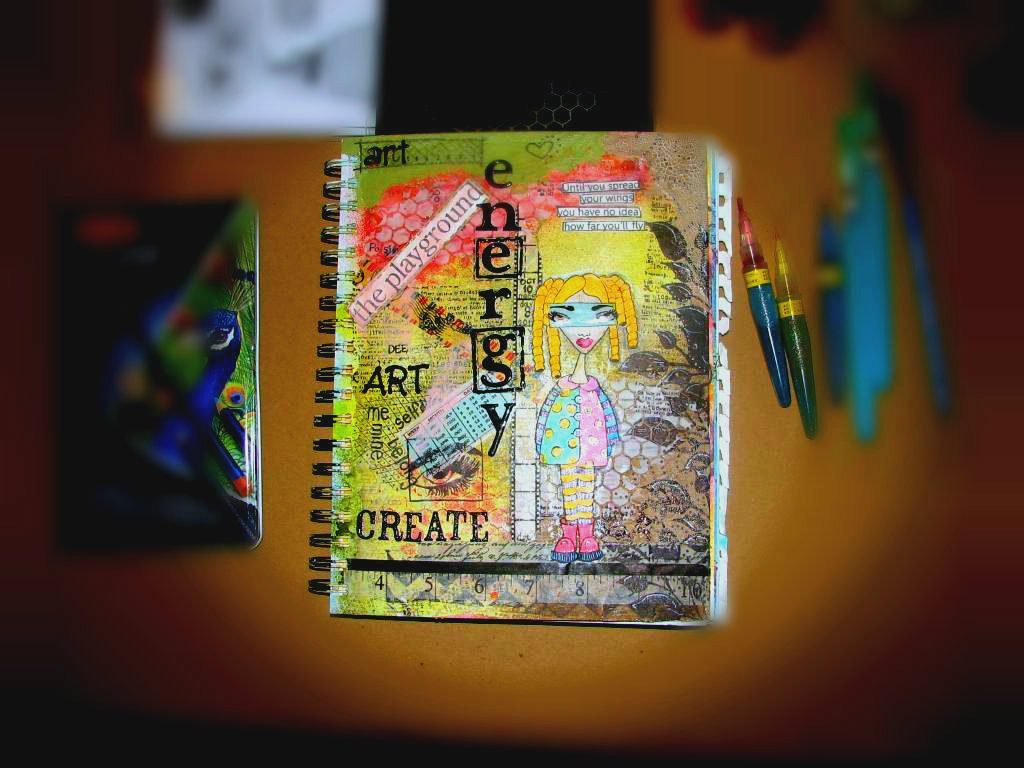
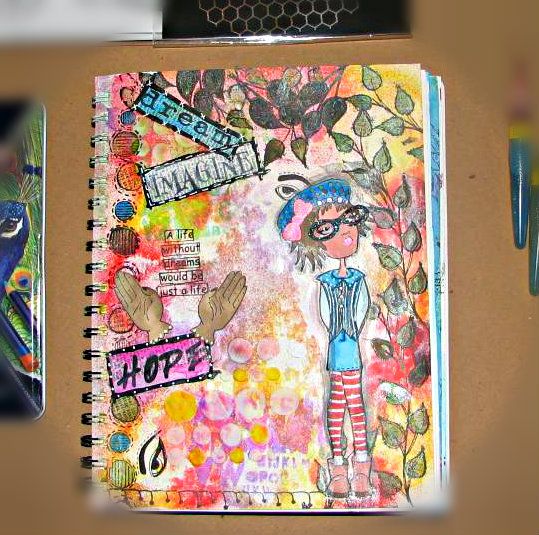
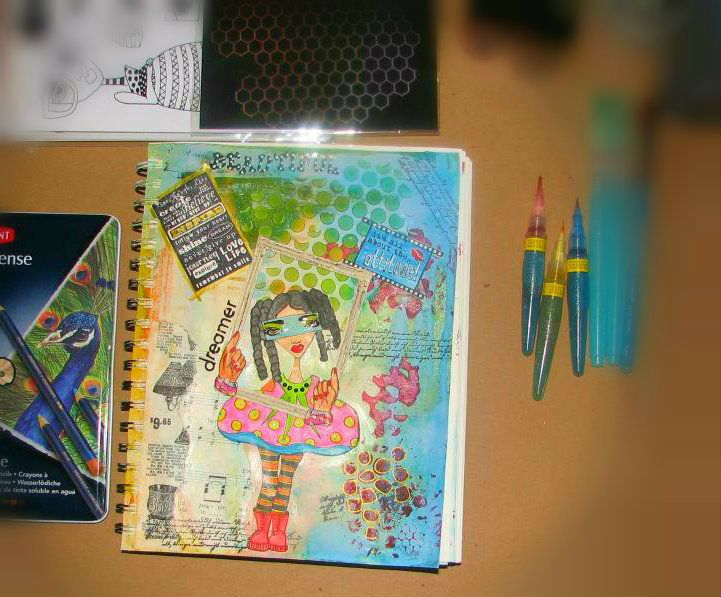
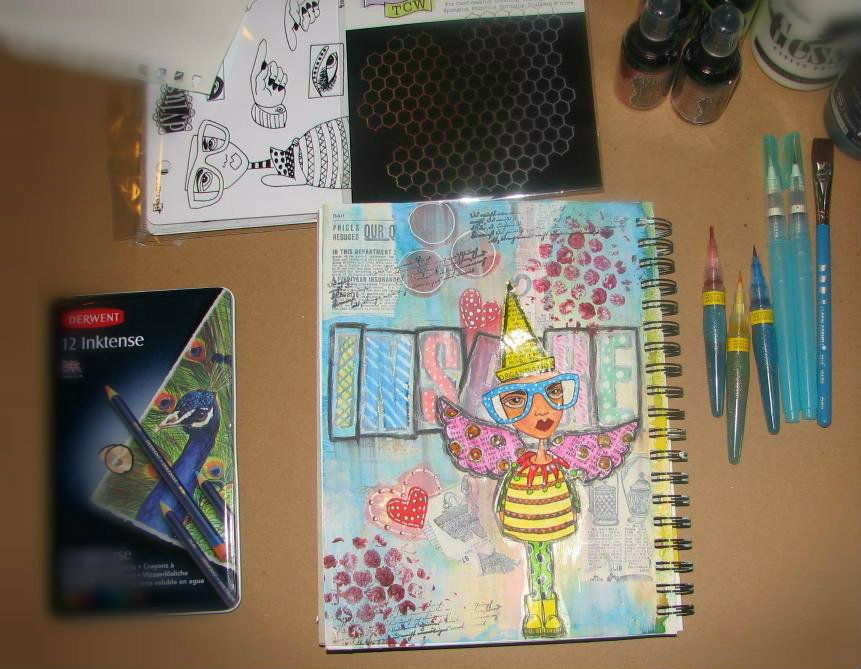
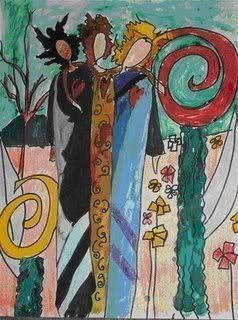
My Dyan Reaveley "Paper Doll" Mixed Media Art Journal
I wanted to do an Art Journal using Dyan Reaveley "Dylusions" products and techniques ....so I decided to do it in the form of a paper doll journal. Just thought I would let the paper dolls display the techniques.......I am having so much fun with this right now.....I am so loving all of the mixed media products and making this journal....Just so many layers and layers of goodness and sooo many techniques...AND..it is super relaxing. The "Dylusions" forced me to use a lot of my other mixed media stuff (products) that was kind of sitting around.....I think I am going to play and see where this takes me......This is so much fun ladies and gents...if you have not yet jumped on the mixed media wagon....Jump on...(Hehe...)I think you'll like it.....TFL all....
(This is the cover of my journal....... )
(inside cover)

Thursday, October 11, 2012
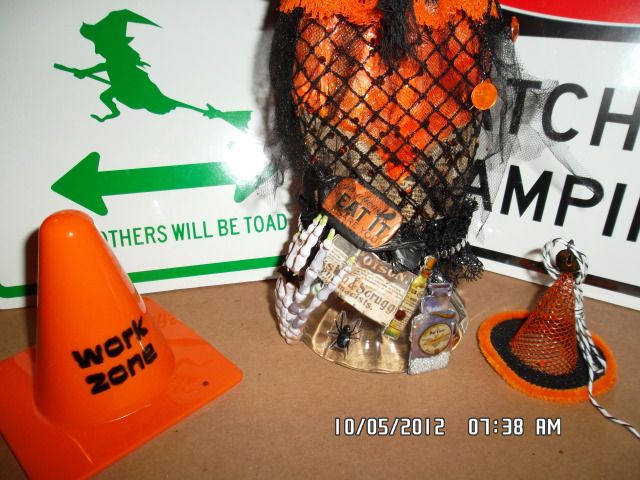
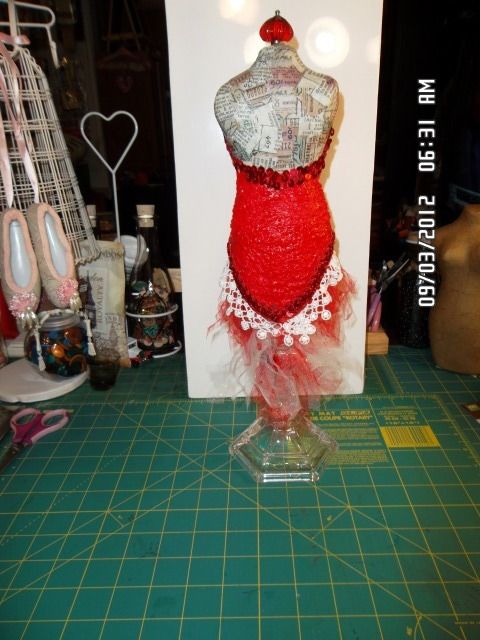
Paper Mache "Halloween Witch" Dressform
Halloween Witch made with a dressform I handmade using paper mache. I was getting somewhat addicted to making these things....I'll have to do a tutorial on this one.....It is super easy and so much fun....The dressform sits on a sundae glass and is about 9" tall...... This one is being shipped out to a friend just in time for Halloween............Hope she likes it...Thanks for looking all....

Wednesday, October 3, 2012
TH "Rickety House" Halloween Tag
I am still having fun with halloween projects ...so..... I'd love for you to check back frequently to see what I create....
Recipe
TH Rickety House Sizzix Die
TH Sizzix Tag
Corrugated Cardboard
Embossed/weathered Technique
/brown/ivory/black paint
DCWV Haunted Estate Cardstock stack
K&Co border strips- ghosts (fussy cut)
transparency -yellow
BOO- M's $ stamp
SCREAM -SPOOKY cutouts from DCWV paper stack
lace- Black
black, orange crinkled seam binding
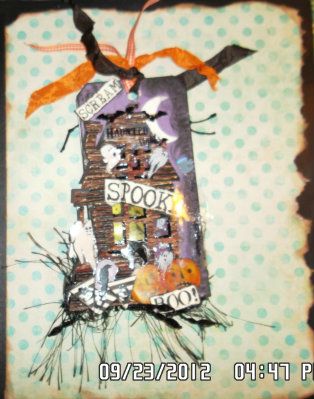
"BOO" Halloween Tag- ItripledogdareU YT Challenge
I participated in the YT ItripledogdareU challenge. ( in September) It was really loads of fun. We had to create a card, tag or LO with a Halloween or Fall theme. You had to use a layering technique, laces and/or trim and a vintage image. The item also had to have at least 3 flowers on it. Okay, I think I met all of the requirements ...so... here is my card.......Thanks Lydia for hosting the challenge....I enjoyed.......TFL

Recipe
Recollections Corrugated Cards
Witch/pumpkin image - computer generatedweathered wood technique
ivory paint
brown paint
Prima mini flowers
Prima flower
Homemade lace flower-(J's orange lace)
black lace trim with hanging bead
Jolee's Boutique- Spells Embellishments
BOO- orange chipboard alphas
Inksentials Accent enamel-Black
Crackle accent
Washi tape
transparency
Recollections printed kraft paper
Stampin up markers
glitter ribbon-TM
raw jute
Friday, September 7, 2012
Scraproom Organization: Camera Setup- (JVC Everio, Manfrotto Articulated Arm and Super Clamp)
(click on pic for larger image)

Tuesday, September 4, 2012
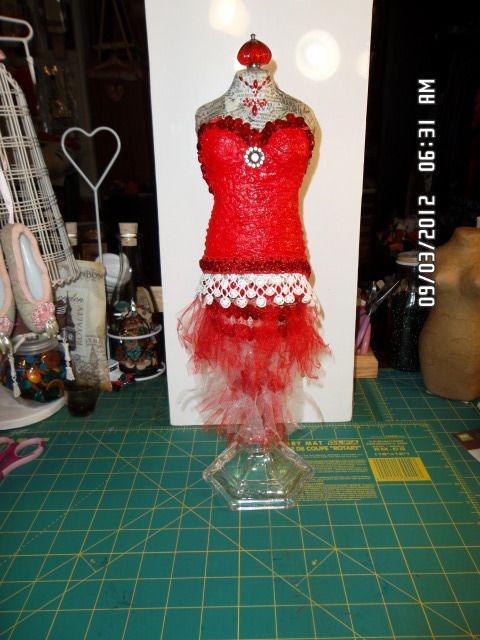
Altered Dressform-Charlene Gibson inspired
Wow....It's been a minute......but, I'm back.......Just wanted to share a few things that I have been doing.....I found this Youtuber (charlenegibson) and I thought her work was superb...Thanks for the inspiration Charlene........Though I did not want to go through the entire process that she went through in making the paper pulp...I found a work around. The dressform is a Micheal's dressform..($7.99...but of course use a coupon).......(I covered it with Tim Holtz washi tape...... and the body of the dress was made from paper mache. Charlene made her paper pulp from scratch...I sort of cheated (hehe..). I purchased paper pulp from ACMoore ($9.99...again...don't forget your coupon...)....You know the kind that you add water to....Yeah...instant paper pulp...(hehe..) .I made the bottom of the dress using tulle....I hot glued it around the dressform...stripped it ...and applied heat using my heatgun..The heat makes the tulle curl.........Another lil technique I learned from a youtuber (nanajl54)......And here is my completed dressform.....I sooo enjoyed this project......Give it a try....Now to find something to do with the rest of that paper mache......Charlene you may have started something here...(hehe...)...I know as much as I like dressforms....I'll be making more of these..I also did a youtube video it does not show you how to make the paper pulp...but you can check charlene's video out and she shows you how to make that...... .... So ....what do you think??????
Front View
This is the back.......of the dressform
Tuesday, March 6, 2012
"Mardi Gras" Mask Canvas
Nothing spectacular...But this is a Mardi Gras Mask that I made for my "bestest friend" Lisa. I forgot to post it on my blog because I procrastinated and got it in the mail late. She's from Louisiana and participates in a lot of the festivities during that celebrated season...I decided to make the mask for her ...but did not want to go overboard with it....and then I needed someway to display it....so I used a 8x10 canvas.......I forgot to take pics ...but did make a video of it......
I wanted to wait until she received it....But I took too long to get it in the mail............Sooooo....I made her watch the video......(hehe..) ......... I hope she likes it...... I was not able to get it to her by Fat Tuesday....but still wanted her to have it....Enjoy Lisa.....Hope you can find a place for it in your scraproom......
I wanted to wait until she received it....But I took too long to get it in the mail............Sooooo....I made her watch the video......(hehe..) ......... I hope she likes it...... I was not able to get it to her by Fat Tuesday....but still wanted her to have it....Enjoy Lisa.....Hope you can find a place for it in your scraproom......
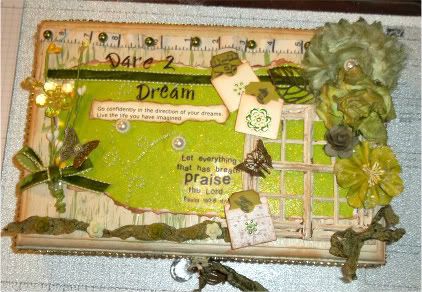
"Dare 2 Dream"- Altered Cigar Box
One more to go ...and I am through. This is number 17 of the 18 boxes I altered. Wow...that was a lot and a lot of work.....But I enjoyed evry moment of it making these boxes..........I noticed that a lot of the ladies favored kelly green.......and red.......Each and everyone distinctively different........The ladies are so very proud of their cigar boxes....( I don't think they even know what they are...(hehe..)......and it makes me happy that I could make them happy with my li'l piece of art.............One more and I am "Almost" done though......for this round anyway.......(hehe)...Yeah...they keep me busy.........I think I am going to move them away from the cigar boxes.......I just have to think of something else that they would like......(hehe...)..This cigar box also has her name on the front of it.....I used Thickers in the same color....but forgot to take a pic of that image...I made her one initially and she gave it away .....and ordered another.....I wanted to make sure she did not give this one away.......so I personalized it with her name...(hehe...)


Saturday, March 3, 2012
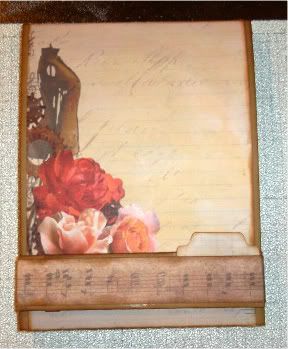
Matchbook Mini Album- KO style
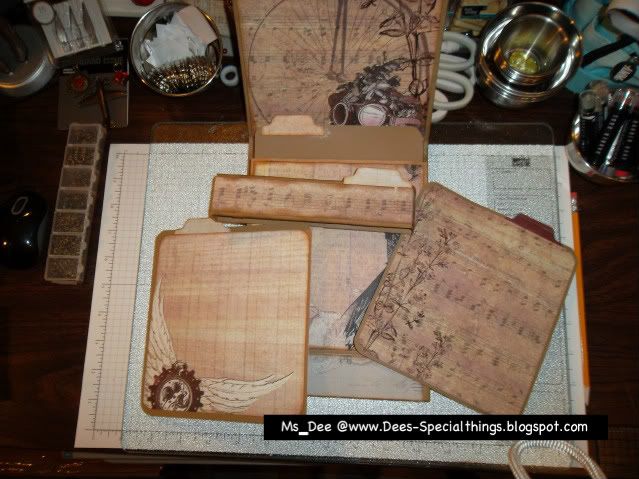
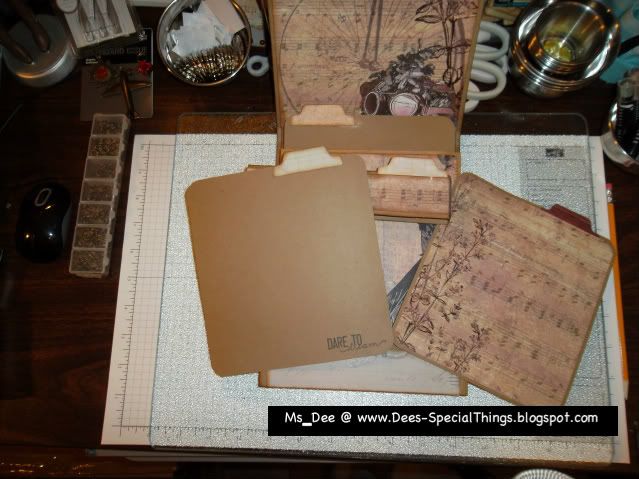
Okay....I absolutely love, love,love Kathy Orta designs. Check her out......But...I have not had enough time to do anything crafty for "me" lately....So...I set aside enough time for me and challenged myself to complete at least one mini.....I was inspired to make this mini by so many youtubers out there....They made it look like it was super easy and so much fun....Because I had completetd a couple of her minis before I decided to give this one a try.....and yeah....just as I thought it was fun. fun, fun and super easy.....
So...after making this one...I made a few more.....I have not embellished any of them yet but have made the albums using kraft paper AND white and black cardstock.......I used the same instructions for all of them ...but each looks different......Here is a pic of the first one I completed....I'll post a pic of the completed albums once I put all of the embellies on it.......I used Kraft paper, "Donna Salizar's- Antiquities" paperstack and the McGill's Tab punch.....The album measures 8.5x6.5.......TFL everyone....
(closed Mini with Belly Band)
 (opened Mini )
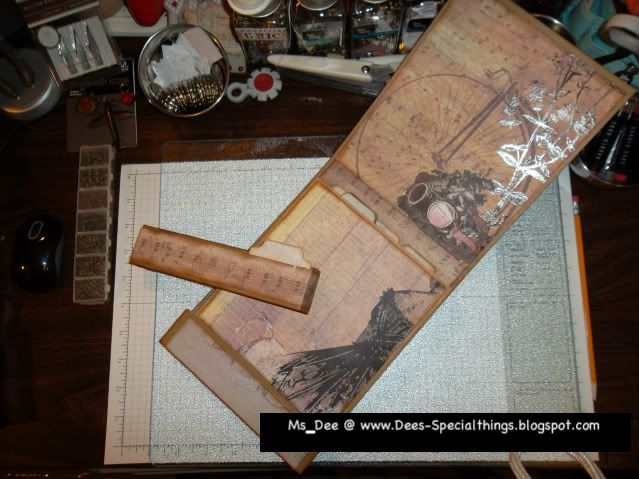 (mat inserts)
So...after making this one...I made a few more.....I have not embellished any of them yet but have made the albums using kraft paper AND white and black cardstock.......I used the same instructions for all of them ...but each looks different......Here is a pic of the first one I completed....I'll post a pic of the completed albums once I put all of the embellies on it.......I used Kraft paper, "Donna Salizar's- Antiquities" paperstack and the McGill's Tab punch.....The album measures 8.5x6.5.......TFL everyone....
(closed Mini with Belly Band)
"Sweet Dreams" Layout using Corrugated Cardboard-SaCrafters inspired
Another project inspired by Youtuber SaCrafter using Corrugated Cardboard. I thought the idea was a cute one because it allowed me to use more of the lil treasures that I was inspired by her to make ......and was inspired to do this layout..... I have not made layouts lately so this was fun to do....."Gotta get those pics out again". I used a 12 x12 sheet of corrugated cardboard and I ripped the kraft paper only from the portion of the paper that I wanted to expose the corrugated texture and weathered it with DecoArt weathered crackled medium. I also framed the 12x12 cardboard with a 1" border of the cardboard and weathered it also using the weathered technique......This was fun ...and brought back memories...I need to get back to creating layouts...It has been a long time......TFL everyone.....

Recipe
12x12 corrugated cardboard
12x12 MME Printed Paper Stack-Lost and Found
Shutters- Handmade using corrugated cardboard
SaCrafters-Faux Bling-turquoise
Prima Flowers
iamroses flowers
Flower Centers - SaCrafters Zibbet
"Sweet"-sticker
"Dream"-Cloud 9 Design-foil trimmed Alphas
DecoArt- Weathered Wood Crackle medium-
Liquitex BASIC Acrylic-unbleached Titanium
Galaxy- Acrylic Paint- Burnt Sienna
Tuesday, February 21, 2012
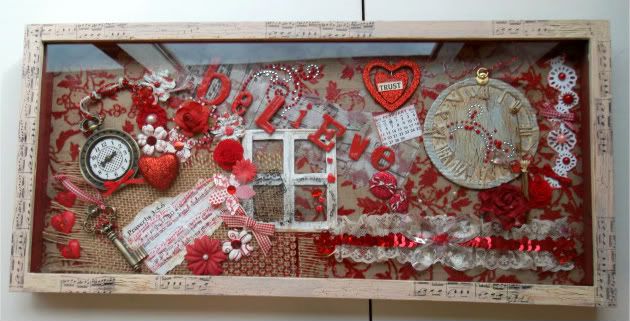
"Believe" Altered 9x20 Shadow Box
I completed this shadow box last week. I had given it to the person that I made it for before I was able to take a pic of it....so I asked her if she could leave it at work until I came back this week....Yay....she did ......This was not a Valentine's project ...though it looks like it....But February is her birthday....and she loves "red"........I added a couple of SaCrafters inspired projects (Roman Clock and a window frame)...and really like the way it turned out....She loved it.....So yeah...I'm happy...The shadow box measures 9x20.......I used the weathered wood technique..and stamped it with a music note stamp using black Stazon ink, I also used a couple of the M's metal embellishments......TFL.....
(click on image for a larger view)
(click on image for a larger view)
Monday, February 20, 2012
Micheal's "Altered" Photo Frame - and SaCrafter's inspired 7 Gypsies Photo Tray - (using Corrugated Cardboard)
I came across SACrafters video where she made the 7Gypsies Photo Tray using the corrugated cardboard. (So clever Sa....) Click here to check her video out....Well it looked relatively easy......So...I decided to make one...and while looking around in my Scrapbook room I came across a few photo frames that I purchased from M's a while back ....looked on YT and saw someone else used the same frame and applied the same concept....But she used a E-Valentine 's kit.....I went to the vintage site and purchased the kit ( I cannot remember who it was that posted the youtube video..(Sorry).... ....but the site is http://www.craftysecrets.com/ It is a vintage paper site......Loads of cool vintage stuff for sale......The kit is a pretty large kit, had a bunch of images, envelopes, postcards and other goodies and it was only $5.......If you are looking for vintage images....check the site out......
I'll probably make more of both of these ... SaCrafter's project and the M's photo frame.......TFL....
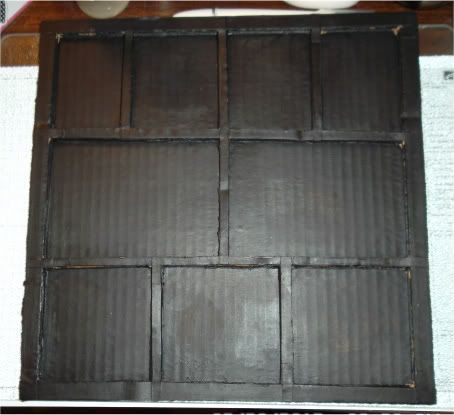
This is the Phototray that I made using the corrugated cardboard......I used 12x12 sheets of corrugated cardboard.....Thanks for the clever idea SaCrafters.........The hardest part was painitng it ...as it had many nooks and crannies......


I'll probably make more of both of these ... SaCrafter's project and the M's photo frame.......TFL....
This is the Phototray that I made using the corrugated cardboard......I used 12x12 sheets of corrugated cardboard.....Thanks for the clever idea SaCrafters.........The hardest part was painitng it ...as it had many nooks and crannies......
this is the M's frame that I altered........
and this is the finished project.......I did use a few different images of background paper...I think only two of the mats are images from the E-Valentine's kit.......TFL.....
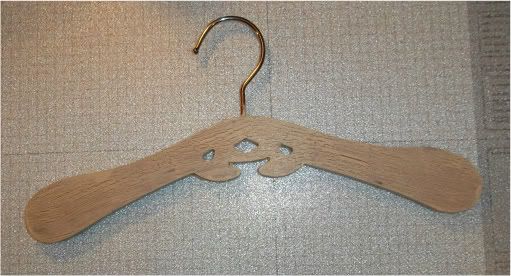
"Love" Altered M's $1 Hanger
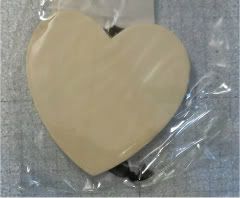
I altered a hanger that I purchased from M's during one of their $ day sales...I purchased a bunch of these hangers for 30cents a piece.......and decided to alter a few.....I also purchased a wooden "heart" charm....and altered it using part of a E-Valentine's kit that I purchased after seeing it used on a video on YT. I also used most of this e-kit on another altered project.
This is one of the hangers that I used.......I altered it using the weathered wood technique....(the hanger in the final pic is a different style hanger. I purchased 3 different styles....)
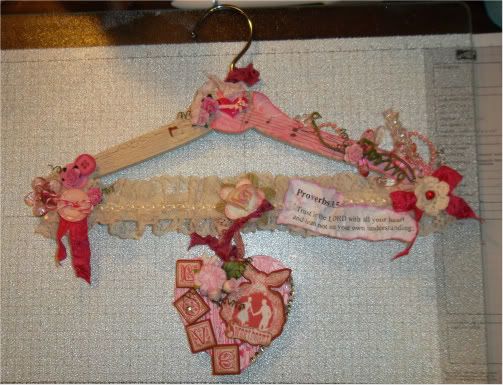 And the finished project.......The heart charm has a black ribbon attached that I changed out and used two different colors vintage wrinkled seam binding and attached it to the hanger........I had fun with this one ..TFL yall......
This is one of the hangers that I used.......I altered it using the weathered wood technique....(the hanger in the final pic is a different style hanger. I purchased 3 different styles....)
and the wooden heart charm from M's $ spot
Sunday, January 29, 2012
Just Another "Altered" Cigar Box......"Life Little Notes"
I was down to the last 3 cigar boxes I had to complete (alter)......I just completed another one ....So I had 2 to complete ...But got orders for 4 more .......I have so not put them on my "to do" list yet.....BUT ....I am going to go and pick up more cigar boxes today because "Mother's Day is just around the corner.......
Here is the Altered Cigar Box I completed this weekend......I used Youtuber SaCrafters Corrugated cardboard technique to make the Prima-like Shabby Chic window frame. Such awesome goodness....Check her out......TFL everyone


and the inside of the box contains 2 little journals that I altered. I also adhered bible verses to the top of the inside lid.....TFL....

Here is the Altered Cigar Box I completed this weekend......I used Youtuber SaCrafters Corrugated cardboard technique to make the Prima-like Shabby Chic window frame. Such awesome goodness....Check her out......TFL everyone
the front, back and sides are pretty much the same.....
and the inside of the box contains 2 little journals that I altered. I also adhered bible verses to the top of the inside lid.....TFL....
I returned my "Imagine"...BUT look what I got....(hehe...I'm elated...).
I got an "Imagine for christmas and kept playing with it....but just did not like it.....I did say I would not buy it anyway because (IMHO) it did not make sense to have a seperate tool that printed/cut images...Afterall..my printer does that......I never purchased the Imagine and really did not want it.....But because I was gifted it....I ended up with one...
Well, I tried it out....again and again...But...having it.....still did not make me want it....So...I packed it up and returned it to Joann's.......and this is what I purchased. (See Pic below)..
I purchased it Wednesday ....soon after returning the "I" and got it the following Thursday (a week later) ...so I have not had a chance to play yet...I am going to check it out this weekend .....and I'll show you ladies all of the wonderful stuff that it does......Come back to see what I create.....I've been told that I am really going to like it..(hehe..).......From the research that I've done thus far...I don't think I'll be dissapointed......(It looks almost like my e-Craft...)
Subscribe to:
Posts (Atom)


 Click on the Blinkie and see Jeannie Phillips amazing creations.


